Setup Guide
Follow these steps to install, activate, and configure CueInterview. Each section covers one setup task in order.
1 Open the app for the first time
When you open CueInterview for the first time, macOS may show a warning:
"CueInterview is damaged and
can't be opened."
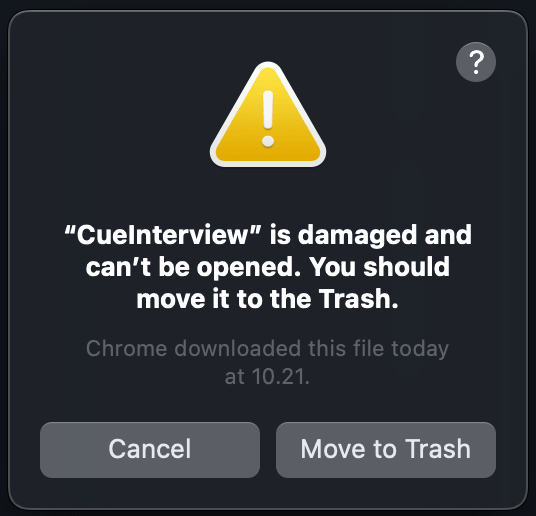
This is macOS Gatekeeper blocking an unsigned app. To fix it:
- Move CueInterview.app to your Applications folder.
- Open Terminal (find it in Applications › Utilities, or search with Spotlight
⌘ Space). - Run this command and press Enter:
xattr -cr /Applications/CueInterview.app- Open CueInterview again — it should launch normally this time.
xattr -cr command removes the quarantine flag that macOS placed on the downloaded file.
2 Sign up and activate your license
When you launch CueInterview, a sign-in window will appear.
- If you haven't purchased yet, click "Buy credits" to visit the pricing page and complete a PayPal purchase.
- After purchasing, you'll receive a confirmation email with your account details.
- Enter your email and password in the sign-in window.
- Click "Sign in" — the app will verify your license and unlock.
BYOK plan: you'll be prompted to enter your own OpenAI API key after signing in.
3 Install the BlackHole audio driver
CueInterview needs to capture your system audio to transcribe the interviewer. BlackHole is a free virtual audio driver that makes this possible.
- When you see the banner "Audio loopback not configured", click "Install BlackHole".
- A confirmation popup will explain what happens next — click "Continue".
- A Terminal window opens. Enter your macOS password when prompted (this is
sudofor the driver installation). - Wait for the installation to finish. You'll see "Done" in the Terminal.
- Close the Terminal window and return to CueInterview.
- Click "Check" to verify the installation.
- You'll see a banner asking you to restart your Mac — this is required for the driver to load.
4 Configure the Multi-Output Device
After restarting your Mac, BlackHole is ready. Now you need to create a Multi-Output Device so you can hear your interview while CueInterview captures the audio.
- In CueInterview, click "Open Audio MIDI Setup" (or find it in Applications › Utilities).
- Click the + button in the bottom-left corner and choose "Create Multi-Output
Device".

- In the right panel, check both:
- BlackHole 2ch
- Your output device (e.g., MacBook Pro Speakers or your headphones)
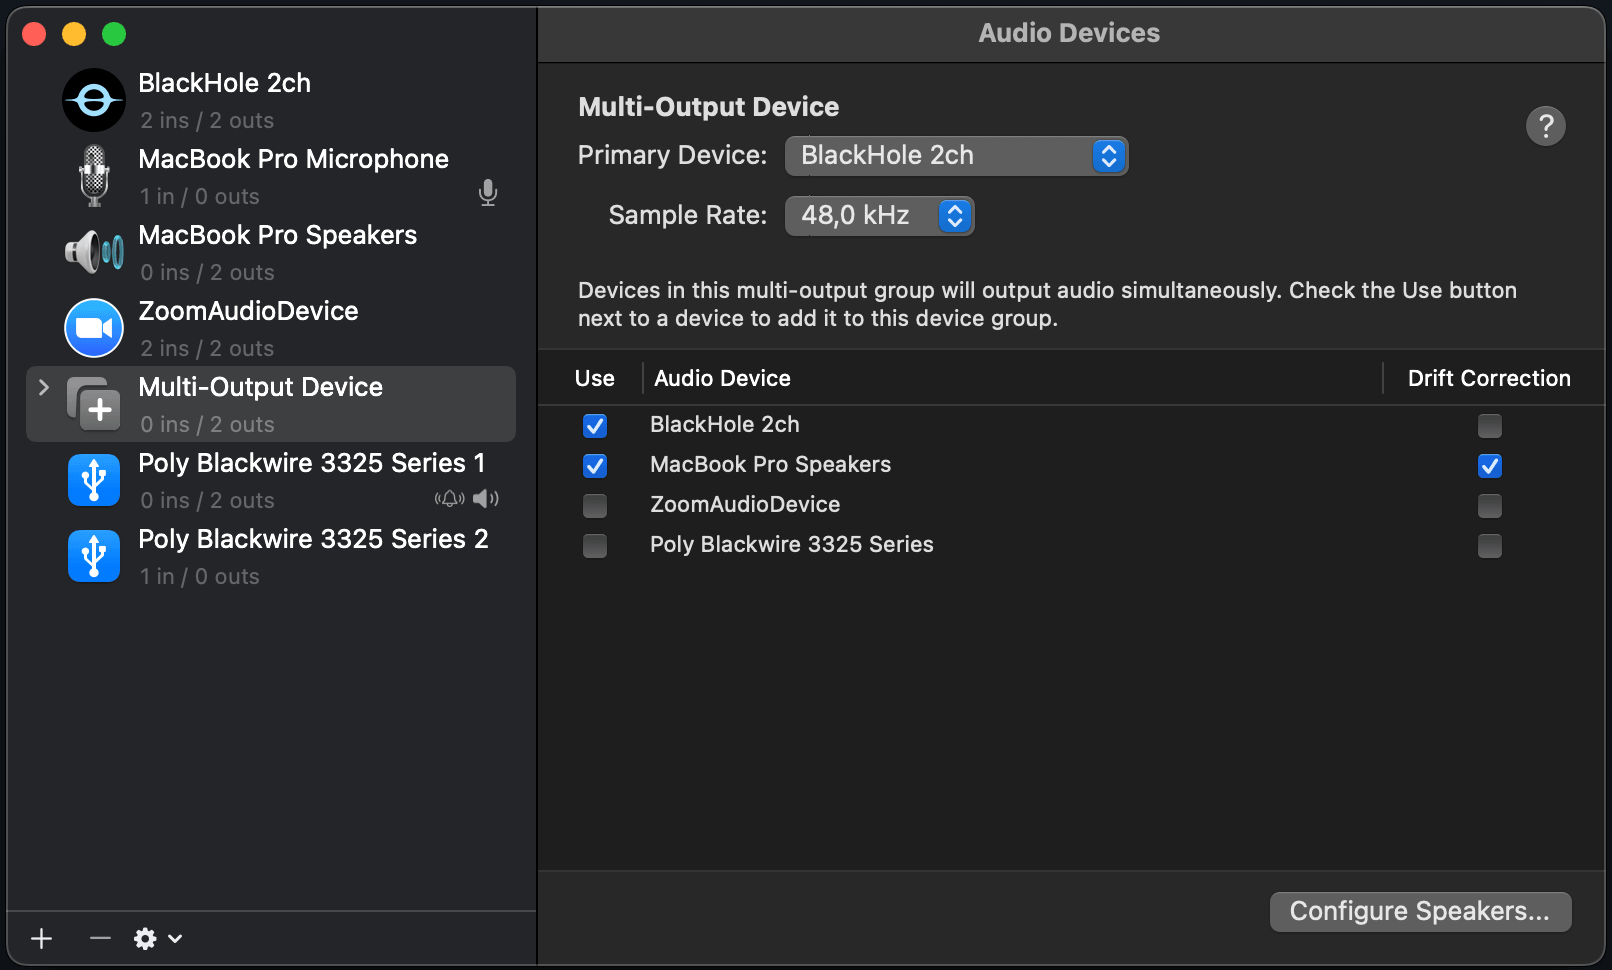
- Make sure BlackHole 2ch is listed first in the list (drag it to the top if needed).
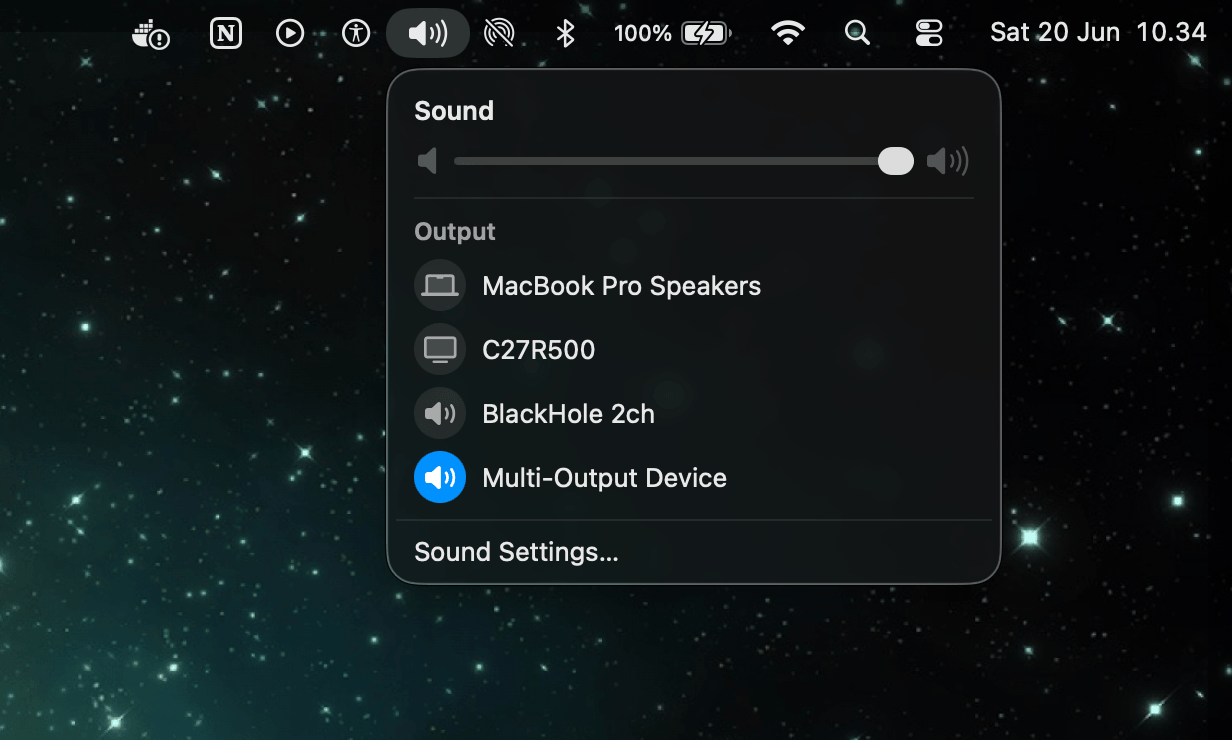
- Right-click the new Multi-Output Device and select "Use This Device For Sound Output".
- Return to CueInterview and click "Check" — the banner should disappear.
5 Upload your resume
Your resume helps CueInterview personalise suggestions with your actual experience.
- Click the "Resume" button at the bottom of the app.
- Select a
.txtor.mdfile (plain text or Markdown). - The AI will now reference your background when generating suggestions.
.txt file if needed.
6 Change programming and response language
Two dropdowns in the bottom bar control how the AI generates suggestions:
- Programming Language — sets the default language for code suggestions (Python, JavaScript, Go, etc.).
- Response Language — sets the language the AI writes in (English, Indonesian, Hindi, etc.).
Change these at any time during your interview.
7 Update your OpenAI API key (BYOK)
If you're on the BYOK Lifetime plan, you can update your OpenAI key at any time.
- From the menu bar, go to CueInterview › Update OpenAI Key….
- Paste your new key (starts with
sk-) and click "Save".
8 Manage your devices (BYOK)
Your BYOK license supports up to 2 devices. You can view and remove registered devices.
- From the menu bar, go to CueInterview › Manage Devices….
- Your registered devices are listed with their names and fingerprints.
- Click a device name (shows ✎) to give it a custom label.
- Click "Remove" to free up a seat for a new device.
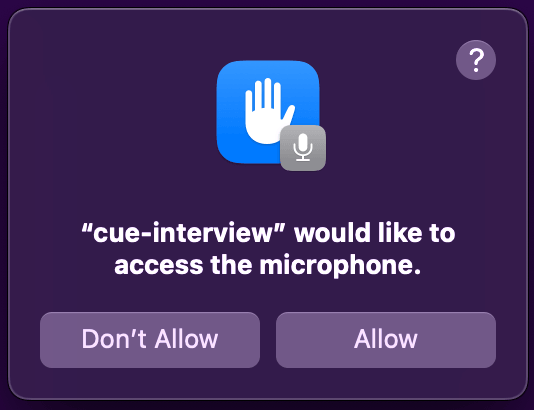
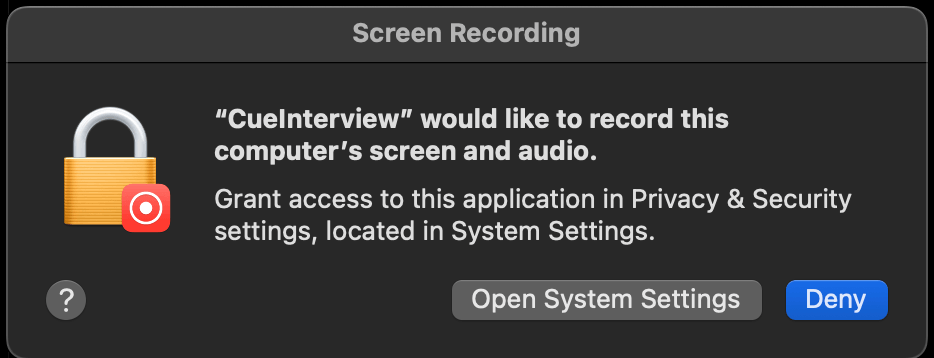
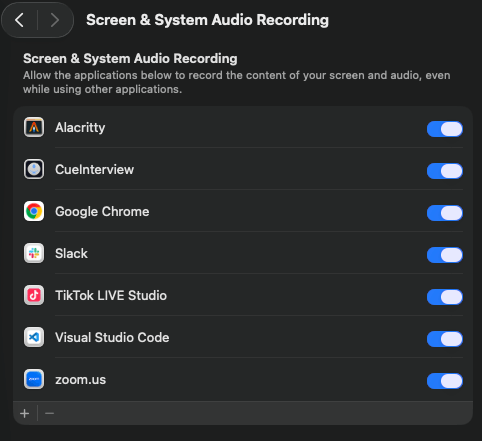
9 Common issues
No audio transcription
- Make sure the Multi-Output Device is selected as your sound output.
- Check that BlackHole 2ch is checked in the Multi-Output Device.
- Verify microphone access is enabled in System Settings › Privacy & Security › Microphone.
- Verify screen & system audio recording is enabled in System Settings › Privacy & Security › Screen & System Audio Recording. Restart the app after enabling.
- Restart CueInterview and try again.
Credits not showing
- Credit information appears after the first minute of use (the heartbeat updates every 60 seconds).
- If credits still don't appear after 2 minutes, quit and restart the app.
"Seat exceeded" error (BYOK)
- Your license is limited to 2 devices. Go to CueInterview › Manage Devices… and remove an unused device.
App window stays on top and blocks other windows
- Press ⌘ \ to toggle click-through mode.
- Or use the toggle button in the bottom-right corner of the app.
If you're still having problems, please contact support at
support@cueinterview.com